Tuesday, November 29, 2011

Felt Bows

I decided to whip up some felt bows for the Craft Fair this year. They didn't sell particularly well, but I thought I'd share them anyway. The inspiration came from Twig and Thistle via Pinterest. The actual tutorial that both she and I used is for making bows from old magazines and can be found at How about Orange. It's super easy and I love the look of the felt, but I'm thinking I may use this in Tanzania to create paper bows for birthdays and what not. They don't exactly carry gift bows at the Nyehunge Super Min Mart. Yeah, that's really the name, but we still call it by the old name, Camp City, which makes so much more sense, right? I run-on and digress.

You'll notice that I made a few different variations: felt with ribbon, just ribbon, felt with embroidery, and folding a little differently. I stitched all of mine with sewing thread and turned them into pins, headbands, hair clips, and regular package bows. Here are some pics of what I made. Any friends who have a little girl and want a free headband or hair clip, let me know.

Package Bows-

 Pins-


 Hair Clips-


 Headbands-


Wednesday, November 16, 2011

Lesson 6- Impressionism/Pointilism

Here is the last art lesson I did before our trip to the states. I'll resume teaching and posting art lessons in February of next year.

Rather than focusing on just one artist, for this lesson we focused on a style, Impressionism. We did look at the work of Seurat and Monet, but didn't attempt to learn a lot about their lives, just their painting.

Have the 9 and 11 year old read the information on this page:
Have them explain the things they think are most important about Impressionism to the 6 year old. (assist if needed) Make sure they include how Impressionism was different from the current painting styles of the time:
subjects- everyday people
subjects not centered
painting outdoors
study of light
Show some images of Monet’s work. I used images from Wikipedia and made sure to include one of water lilies.
Assignment-
11 year old-
I had her do an impressionist style picture from our flower bed outside. I let her choose which section to do and gave her a piece of cardstock with a 3x3 square cut to help her choose her composition. By closing one eye and moving the square closer to or farther away from you eye you can zoom in and out on the scene. It helps when deciding how much of the scene to include in the picture. She was also working on a square piece of paper. In this case I had her use oil pastels rather than paint to avoid the ordeal of getting paints outside and colors mixed. The focus was on the style of impressionism and the idea of working outdoors.

Here is the finished piece.

Meanwhile, with the 6 and 9 year old:
Seurat-
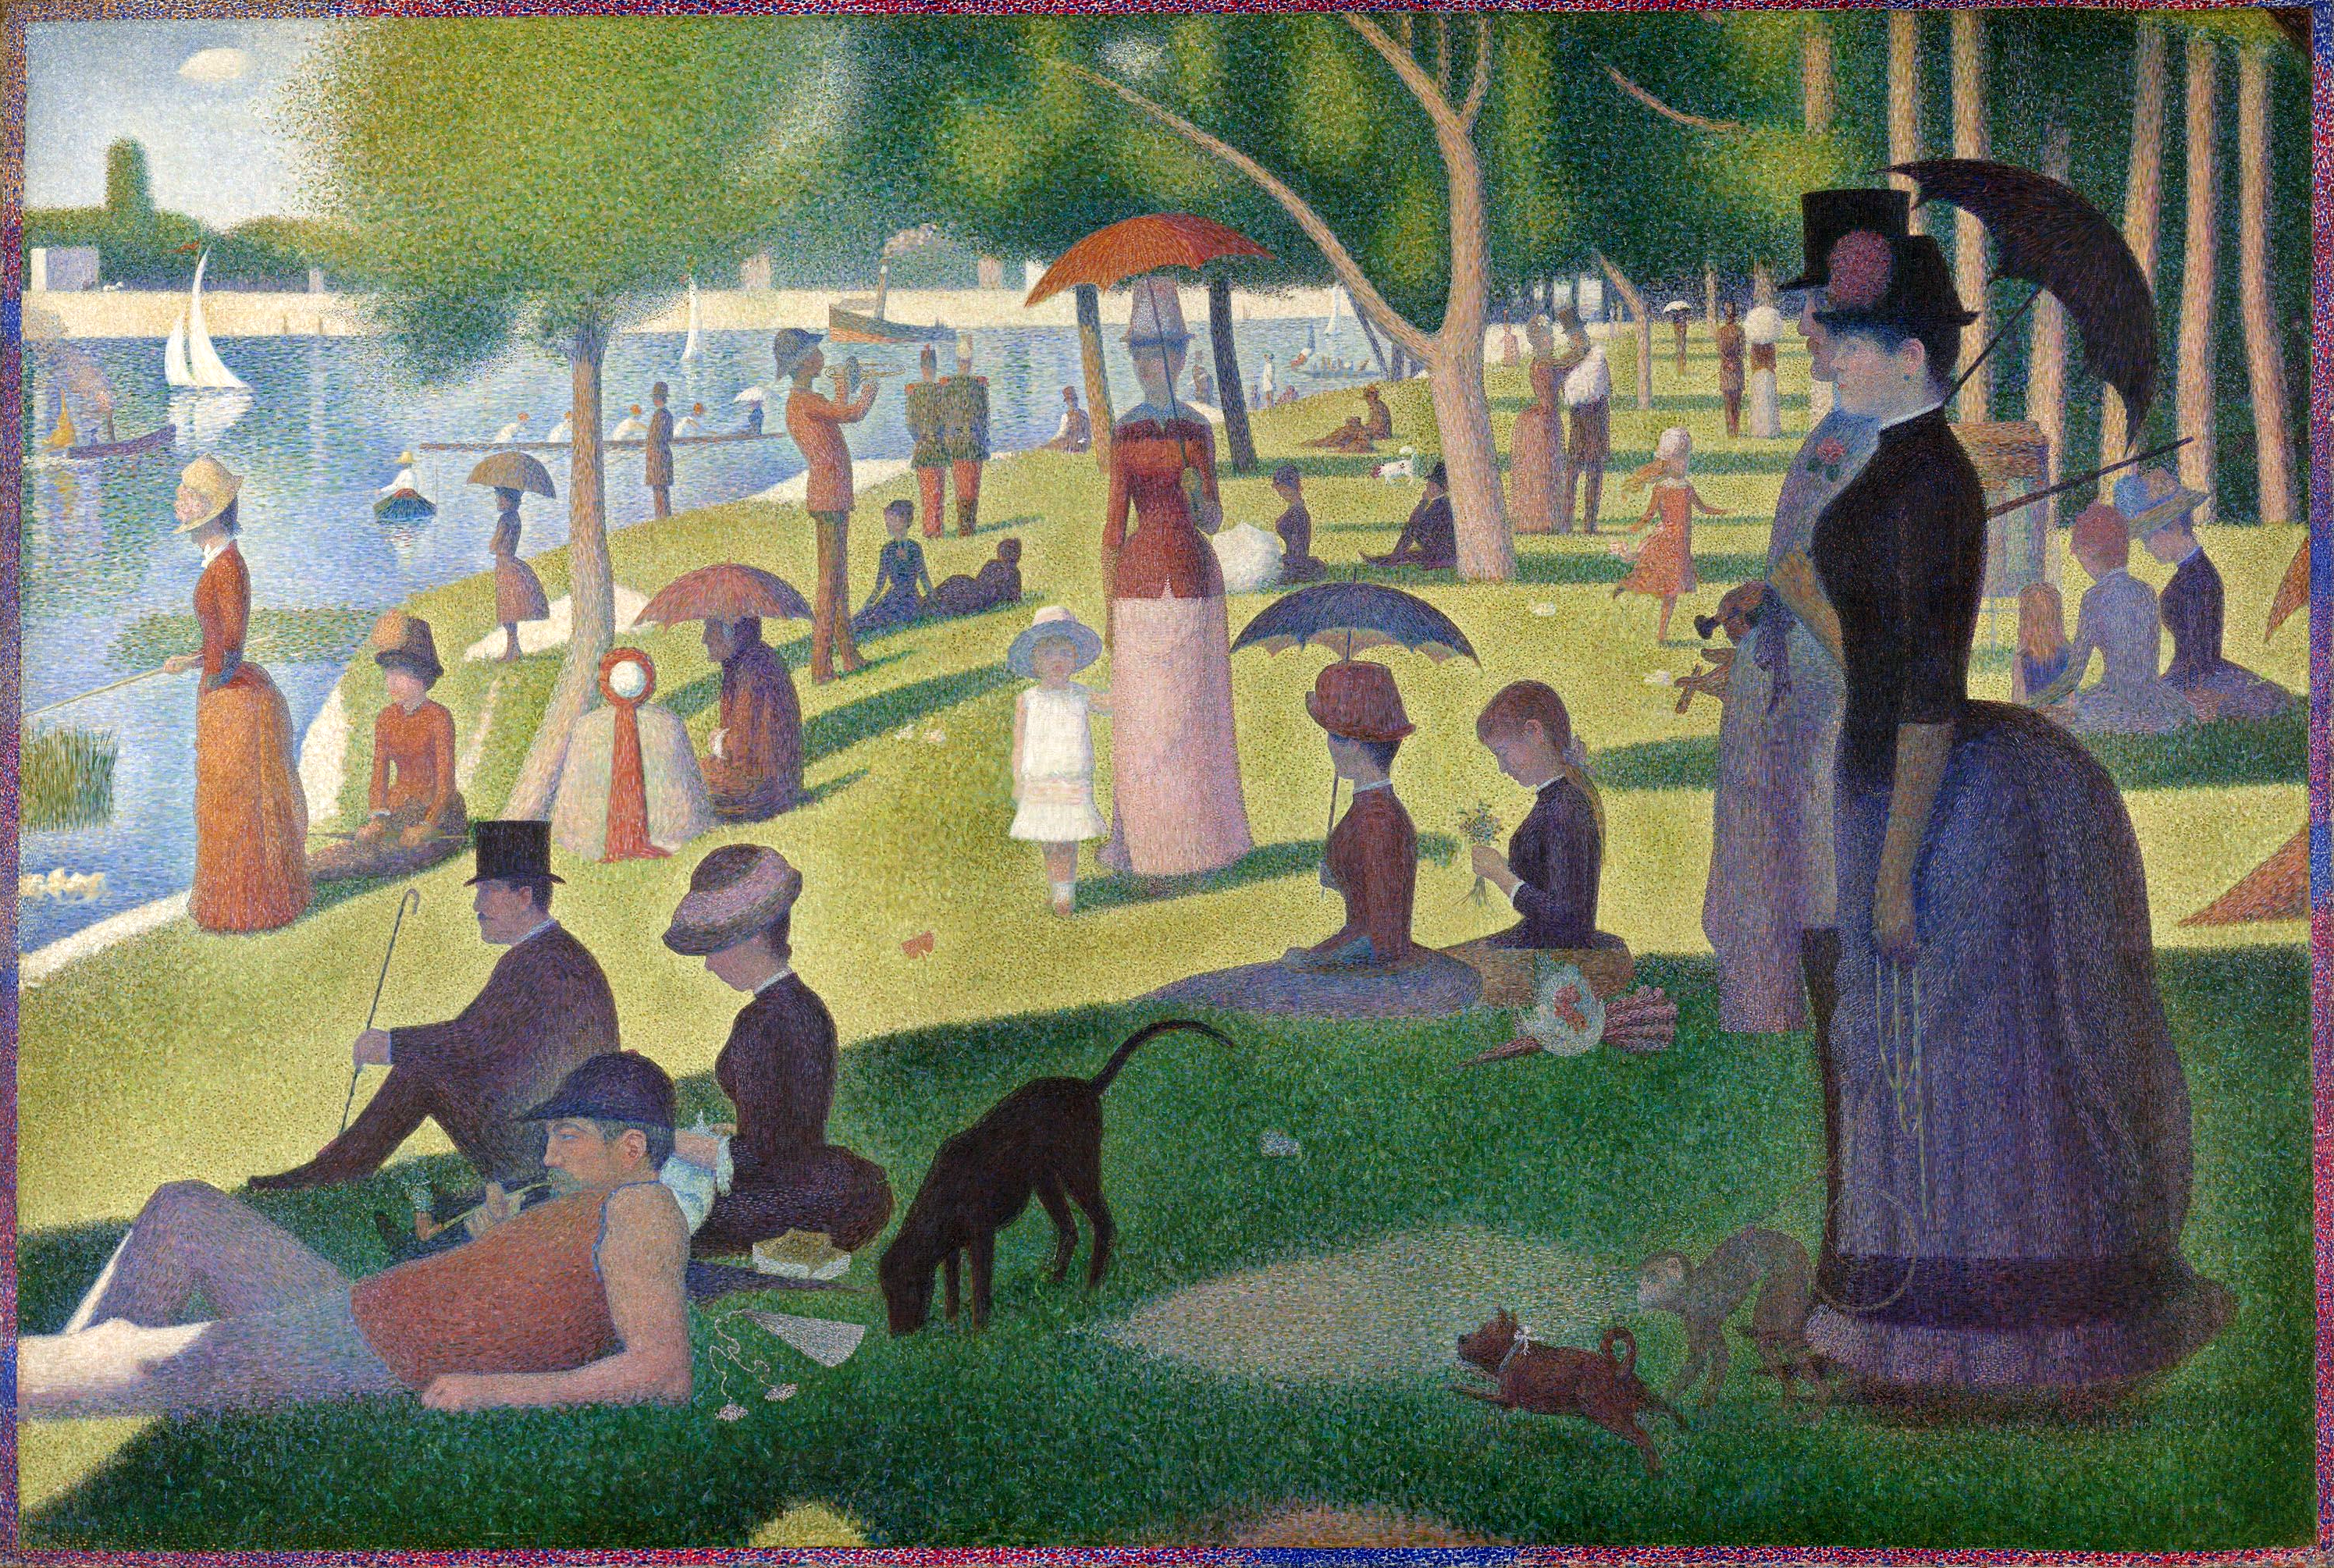
Georges Seurat took impressionism a step further and created a style that is known as pointilism. He covered his canvas with tiny dots to create an image. Rather than mixing green paint, he would place blue and yellow dots close to each other so that from a distance they looked green. 
Look at one of his paintings
Assignment-
Using q-tips or pencil erasers, create a pointilist picture. Give the student a picture to copy of something simple, such as a flower. I just googled red flower and choose a pic that was simple. This takes a while so start out doing a very small picture. Demonstrate this technique and stress taking your time. I had my students do a flower. First, they sketched the basic outline of the flower. Then they filled in the background with green and last they painted the flower. I had several shades of red and green already mixed for them and one shade of yellow. To make a darker red or green add a little black, to make a lighter shade add a little white.

Here's what the paint tray with different shades looked like.

The pointillist pieces. left is the 6 year old's and right is the 9 year old's.

After everyone was finished I let the kids share their pictures with each other and had the oldest tell us what it was like to work outdoors, so we could really think about what the Impressionists were up against (heat, cold, wind and light constantly changing, etc).

Thursday, November 10, 2011

MIA

Well, I've been MIA for a bit now and there is a reason. I'm not really sure if there is anyone who reads this blog and doesn't read my other blog, but just in case click on over to see where I've been:
carsonandholly.blogspot.com

I'm back in the states now for about a 3 month visit, but I've got one more art lesson plan that I've not yet shared (more will come after my return to TZ and teaching). I've also got several projects already made that I'll be sharing and a few new ideas bouncing around in my head for the coming weeks. Stay tuned!

Friday, October 21, 2011

Lesson 5- Edward Hicks


5- Edward Hicks

Supplies-
Access to the internet
printed copies of crossword puzzles found at: http://gardenofpraise.com/artpuz2.htm
printed copy of Noah's Ark color sheet- also found at the garden of praise site. I don't have the exact link, but it's right there with the other resources on the main page.
crayons and/or colored pencils

7 year old- 
Tell her a little bit about Edward Hicks-
He was born in Pennsylvania in 1740. His mom died when he was a baby and he was raised by a Quaker family. When he was 13 he started learning how to paint coaches. Late on he became a Quaker minister, but eventually quit preaching to pursue painting. He painted lots of pictures called Peaceable Kingdom based on some verses in Isaiah. He also painted Noah’s Ark. Show images of Peaceable Kingdom and Noah’s Ark.
Assignment- Color sheet of Noah’s Ark- I am not always a fan of color sheets because they lack creativity, but I think for the little ones it can be a fun way to get the image of a famous painting imprinted in their minds.
11 year old and 9 year old- 
Have them read through info found @ http://gardenofpraise.com/art2.htm. Do the crossword puzzle together. They will each have their own copy, but can work together on it.
Assignment-
9 year old- Choose one of the animals in Hick’s picture and redraw it, mimicking Hick’s style. Now place the animal in a different background.

11 year old- Draw a picture of Hick’s ark once the flood has begun. Is there any land still showing, or just water? What does the rain look like? How does the rain change the look of the boat? Use colored pencils and demonstrate using them for this assignment.

As the students finish they can do the jigsaw puzzle or memory game found here:
Jigsaw Puzzle of Noah’s Ark-
memory game-

All info in this lesson came from the the site listed in the lesson and from Wikipedia.

Wednesday, October 12, 2011

Flower Hair Pins

Last week another of our young teammates celebrated a birthday. This time I decided to make some flower hair pins. I'd seen this project from Martha Stewart and had already started creating my own version of it. You can find Martha's tutorial here.


Martha's project calls for ultrasuede, a nice fabric which doesn't unravel. I can't exactly get my hands on any of that in Geita, so I decided to let controlled unraveling edges be a part of the look. Pretty stitches keep the fabric from unraveling too much, while adding a nice detail to the flower. Here's my process:

1- I cut out 5 petals. You could make a template, but I just free handed it. They don't have to be exactly the same, just similar.


 2- Using some embroidery floss in a contrasting color, I did a simple running stitch around the edges, knotting the thread at both ends.


 3- Following Martha's directions I attached the petals to each other. In this pic they are just all bunched up together. After knotting the thread you can spread them out.


 4- I had to use several stitches between the first and last petal to get it to spread out the way I wanted. There wasn't really a science to it, just wriggling the fabric.


 5- To make my flower into a hair pin, I added beads to the top of the flower while sewing a bobby pin on the back. Basically everytime I went through to the front I added a bead, then pulled the thread through to the back making sure to wrap in around the bobby pin. I used a double thickness of normal sewing thread for this. You could use embroidery floss if your beads have a big enough hole to allow for the embroidery floss needle. Otherwise, you'll have to switch to normal thread here.


If you look closely you can see where the pin is attached. I made sure that the stitches went as far down the pin as possible to secure it. I also did several extra stitches around the bend in the flower to secure it. You don't want the pin to just slide out.


Here are the two that I made for the birthday girl. For the one on the left I actually stitched the fabric to some felt that was cut slightly larger. I like the look of it and it adds some extra durability.


For the wrapping I cut out four circles of tissue paper, two for each side because it was kind of see through. Then I stitched most of the way around.


 I dropped in the pins.


 Then I finished stitching. It almost looks like an Easter egg.


 Here's the birthday girl with her hair pins.


 And her younger sister trying one out.


And here are a few more of these flowers that I've been working on. Some will become hair pins, some brooches, and some are already on headbands. None of them have the beads added yet. These two both have felt backing.


 For the one on the right I used a double row of stitching.


Here are a couple of baby headbands, almost finished. These are a completely different style, just circles with french knots in the centers instead of beads.


Monday, October 10, 2011

Lesson 4- Katsushika Hokusai

Things have been pretty blah around here, or at least my food choices. Pregnancy is in full force and my days are spent trying to decide what to eat next (oatmeal or toast?), fixing the food, and then trying to keep it down. It's incredible just how much time and concentration those things take. Anyway, there hasn't been as much time for crafting, but I do have some things in the works that I hope to be sharing soon. In the meantime, here's last weeks art lesson.

Katsushika Hokusai
1- Present information about Hokusai-
In this Japanese name, the family name is "Katsushika". Get the kids to practice pronouncing the name. 
 Hokusai was a Japanese artist who lived from 1760-1849.
Hokusai is best known as author of the woodblock print series Thirty-six Views of Mount Fuji which includes the internationally recognized print, The Great Wave off Kanagawa, created during the 1820s. Put Hokusai, The Great Wave on the Time Line.
Hokusai had a long career, but he produced most of his important work after age 60. 
Constantly seeking to produce better work, he apparently exclaimed on his deathbed, "If only Heaven will give me just another ten years... Just another five more years, then I could become a real painter." 
2- Look at  Thirty-six Views of Mount Fuji and discuss how the mountain looks different in each one (size, location in the picture, colors). Make sure to point out The Great Wave. This is the most famous so I want the kids to remember it and be able to recognize it.
These prints were created in the style called Ukiyo-e.
3- Discuss printmaking. (this is sort of a deviation from where we are headed with the assignment, but I wanted to take the opportunity to teach a little about printmaking anyway. This step can be left out, particularly with younger ones if desired.) You can also discuss the Ukiyo-e style at this point if you want. Wikipedia has information about details of it.
Show the students some printmaking tools (cutter, brayer, lino blocks) to better explain the process of printmaking. (I’m including this because I happen to have these things on hand, but if you don’t just skip this step.)
4- The assignment- We are going to do our own series called 6 Views of Baobab Trees. (I choose this because Baobab trees grow in Tanzania and the girls are familiar with them. You could also use an Oak tree or any object or landmark you can imagine. Choose something you think will interest your student.)
11 year old- Draw a Baobab tree from 3 different views- above, far away, close up. I want you to imagine that this is the same Baobab tree, so if you draw a house near the tree in one picture it needs to be there in the others, just from the different view.
9 year old- Draw a Baobab tree from 2 different views- far away and close up. Imagine that this is the same tree in both pictures, so if there is a house near the tree in one picture it needs to be near the tree in the other picture.
6 year old- Draw one picture of a Baobab tree to contribute to the collection. Make the tree far away and add lots of details around it.

The oldest is still finishing her pictures so I'll come back and update the post with images once she finishes.

Sunday, October 2, 2011

Lesson 3: Greek Pottery


This lesson is sort of three in one. All three of my students will be learning about Greek pottery and decorating an Amphora, but each will be using a different Greek style.
Supplies-
Homemade Scratch Paper (made with appropriate colors for the style of Greek pottery to be created. See this post for how to make scratch paper.)
something to scratch with- we used toothpicks
images of Greek amphoras and the style or styles you plan to teach- There are a ton on Wikipedia. I didn't have to pull images from any other source.
1- Intro to Greek Pottery- Much of the artwork we know of from ancient Greece is ceramic. This is not necessarily because they made so much, but because it is what has survived.  In this lesson we will explore three of the different decorative styles used on Greek pottery: Geometric, Black Figure, and Red Figure. 
2- What colors are seen on Greek pottery? - The range of colors which could be used on pots was restricted by the technology of firing: black, white, red, and yellow were the most common. 
3- What Subject Matter is used to decorate Greek pottery?
-Greek pottery often told stories about Greek daily life such as funerals, marriages, wars and athletics. Athletics and wars were particularly popular subjects for pottery. These vases depict men wrestling, running, high jumping or throwing a discus. Another very popular subject matter for ancient Greek pottery was scenes from mythology
4- What is an Amphora- a vessel with a 2 handles and a long neck that is narrower than the body. They were used in large numbers to store and transport both liquid and dry goods. Show an image, which can be found on Wikipedia.
5- Go over each style with the student who will be using it. Show images of the style as you explain it. I found plenty of images for each style on Wikipedia. There is a page about Greek pottery as a whole and individual pages for each of the styles. Demonstrate how to used the scratch paper and help them brainstorm what they could draw to mimic the Greek style. Let the student practice on a test piece before doing the real Amphora. 
Geometric was one of the earliest styles (900-700BCE). In the Geometric style pots have several bands going around them creating horizontal lines. Shapes used to decorate include circles, semi-circles, zig-zags, meanders, and simple animals in later Geometric pieces. (There is a page on wiki for meanders that shows exactly what that design looks like)
Black Figure was common between the 7th and 5th centuries BC. The style features black figures painted onto a reddish colored pot.
Red Figure 530BC until 3rd century BC Red Figure is the opposite of Black Figure; a read figure on a black pot.
6- Place each of the styles of Greek pottery on the timeline.

Here is our finished work:


Geometric

Black Figure

Red Figure


Info in this lesson came mostly from Wikipedia. 
The initial concept for this lesson came from:

By the way, I love that last site. It is an incredible resource for art lesson plans and inspiration and it is well organized. I used it all the time when I was teaching in public school.